How to Get your Xbox 360 Repaired using Xbox Support
Use the Xbox Support website to get your Xbox 360 fixed for free!
by
Doug
Updated January 22, 2010

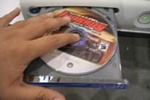
Remove any discs from Xbox 360 DVD drive.

Remove hard-drive from Xbox 360

Remove any custom faceplates on your Xbox 360.
If you're like me, and discovered a problem with your Xbox 360 (in my case the DVD drive failed), it's pretty easy to get your Xbox fixed by Microsoft for free as long as your Xbox 360 is still under warranty. If you're not sure if your Xbox is under warranty, simply follow the directions below and Register your console at the Xbox Support website (you'll then be able to see if your Xbox's is still under warranty). Luckily for me, my Xbox was still under the one year Standard Warranty. Even if your Xbox is out of warranty, you can still use the Xbox Support website to get them to repair your console, but it will cost you shipping and a service charge. At any rate, to get your problematic Xbox 360 fixed by Microsoft's Xbox 360 support, follow these steps:
- Go to http://support.xbox.com
- In the left-hand menu underneath 'Console Management', click on 'Repair Your Console'.
- On the Repair a Console page, click on the 'Register a new console' button (if you haven't already registered your xbox). Fill out the required information including the Serial Number of your Xbox 360, then click the 'Submit' button.
- On the 'My Registered Consoles' page will be able to see when your Xbox warranty expires as well as Request a Repair. On this page, click the 'Request a Repair' button.
- Now fill out the repair request details and select whether you will print out the shipping label or have a shipping label sent to you. At the bottom of the page you'll see if it will cost you anything for the repair (if your xbox is still within the 1 year warranty, shipping and repairs should be $0.00). Then click the 'Submit' button to submit your service request.
- After you submit your repair request you'll get a confirmation service request # and the ability to print out your shipping label (if you had selected print shipping label).
Once you've made your service request, you can then follow it's status by using the 'Check Repair Status' link. They state, that after you send your console to them for repair, your console will be returned to you within 2-3 weeks.
Below are the shipping guidelines that Xbox Support will send you via email right after you submit your service request:
Shipping Guidelines and Instructions
When you ship your Original Xbox or Xbox 360 console to us for repair, please ensure that you use the following guidelines and instructions for what to include inside the shipping package, as well as what to include on the outside of the shipping package.
Preparing your console for shipping
- Remove the hard drive if one is attached to your console (Xbox 360 only)
- Remove any custom faceplates (Xbox 360 only)
- Remove any discs from the disc tray (Original Xbox and Xbox 360)
- You can also download additional packing instructions:
Important notes about preparing your console for shipping
- Do not include any games, hard drives, cables, controllers, or any other accessories with the console unless you were instructed to do so by an Xbox Customer Service agent. Accessories that are included with the console cannot be returned to you.
- Do not use your Original Xbox or Xbox 360 packaging to send your console in for repair because the packaging will not be returned to you.
- Do not write "Microsoft" or "Xbox" on the outside of the package.
Packing Instructions
- Use a sturdy box that is well padded to help protect your console during the shipping process. Note that your console will be returned to you in packaging that Microsoft provides, and not in the packaging that you used to send your console.
- Write your complete return address and the Service Request Number on the outside of the package. You can find your Service Request Number at the beginning of this e-mail message.
Shipping Instructions
- Check your shipping label for the shipping company that you should use to ship your console. Drop off your console at a location that accepts packages from the specified shipper.
- United States: Typically consoles should be shipped through UPS. Please check your label to ensure that UPS is specified. If so, they take your package to The UPS Store or a location that accepts packages that are shipped through UPS.
- Canada: Typically, consoles should be shipped through Purolator or Canada Post. Please check your shipping label to determine the shipper, and then drop off the package at a location that accepts for the specified shipper.
- Obtain and retain a receipt of shipment for your records.
- IMPORTANT: We cannot change your return shipping address after you ship your console to us for repair. Be sure that you verify your return address before you ship your console.