How to Transfer Email Account File information from Windows Mail to Windows Live Mail

Export Internet Account Files from Windows Mail so that you can import the account details into Windows Live Mail on a Windows 7 computer.

Import your emails Internet Account File (.iaf) into Windows Live Mail.
If you're making the jump to begin using the Windows Live Mail email client now in Windows 7, from the Windows Mail client that was on Windows Vista, you may want to transfer over your previously entered email account setup details that you had been using in Windows Mail. Instead of manually setting up your current email accounts that you had in Windows Mail, there's a much quicker and better way to get your email account information configured in the Windows Live Mail client in Windows 7, especially if you had a lot of email accounts setup in Windows Mail (on Vista).
So to move and copy email account details from Windows Mail (Vista) to Windows Live Mail (Windows 7) here's what to do:
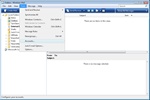
- Open Windows Mail and go to Tools -> Accounts
- In the Internet Accounts pop-up box, select your email account that you'd like to transfer to Windows Live Mail, then click the Export button.
- Now save the Internet Account File (.iaf) to an easy to remember location on your hard-drive.
Now the next thing to do is to locate the folder where you just Exported your emails Internet Account File to on your hard-drive. You will need to copy and move this folder to temporary folder on your Windows 7 computer. You should be able to easily transfer the Internet Account File (.iaf) to a Flash drive, or an external hard-drive, or burn it to a CD/DVD, or through a Network that is setup between your Windows Vista computer and your Windows 7 computer.
So once your email internet account file (.iaf) has been copied over to your Windows 7 computer you will now need to import the file into Windows Live Mail. Here's how:
- Open Windows Live Mail, by clicking Start -> then click All Programs -> then click the Windows Live folder -> and open Windows Live Mail
- In Windows Live Mail, you may need to show the Menu bar if it's not visible, press Alt + M keys on your keyboard. A drop down menu will open up, click on Show menu bar.
- On the menu bar, go to Tools -> Accounts -> and click the Import button.
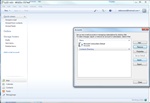
- An Import Internet Account box will pop-up, find and select the email internet account file (.iaf) that you just copied over to your Windows 7 computer, the click the Open button.
- A few seconds later, you should now see the imported email account in the Accounts box, and also listed on the left-hand side of Windows Live Mail.
- That's it...
Keep in mind that the steps outlined above do not import email messages from the email account you just imported (or Windows Contacts). You will have to import messages and contacts seperately. To learn how to import messages check out how to Export and Move Windows Mail messages to Windows Live Mail.